
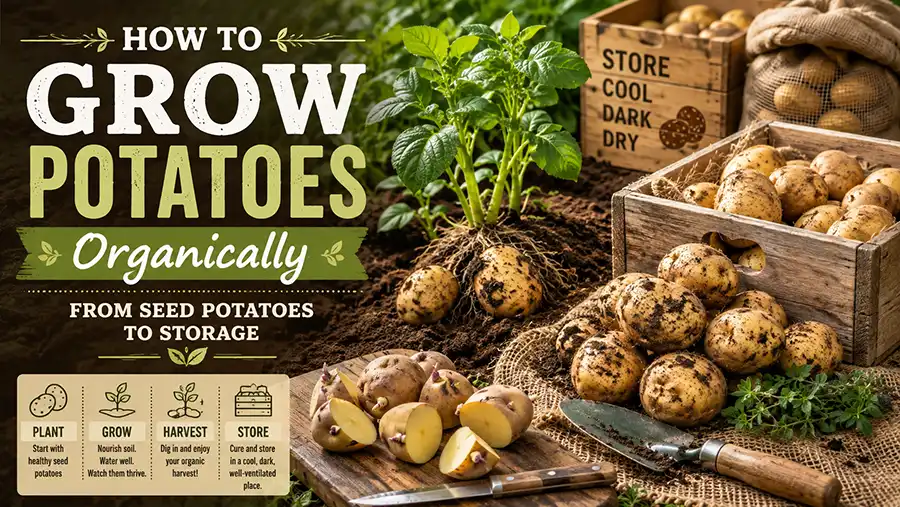
Learning how to grow potatoes organically comes down to four fundamentals: healthy seed stock, loose soil, steady moisture, and enough cover over the developing tubers. Potatoes are forgiving enough for a first garden, but they reward good timing and close observation. A few carefully planted seed pieces can supply tender new potatoes in summer and a dependable storage crop for winter.
This practical guide follows the crop from seed potato to cellar, separating useful techniques from gardening folklore and explaining how to handle weeds, insects, and disease without routine synthetic pesticides.
Quick answer: the organic potato method
Buy certified disease-free seed potatoes. Plant them in well-drained soil once it has warmed to about 45°F (7°C), spacing pieces 10–12 inches apart and 3–5 inches deep. Keep moisture consistent, hill the plants so no tuber sees sunlight, and scout often for beetles and blight. Harvest new potatoes after flowering or lift the main crop after the vines die back. Cure sound mature tubers for about two weeks, then store them in a dark, humid, ventilated place near 40°F (4°C).
| Stage | Working target | Purpose |
|---|---|---|
| Planting | Soil 45°F or warmer | Avoid rot in cold, saturated ground |
| Depth | 3–5 inches | Protect seed pieces |
| Spacing | 10–12 inches; rows 30–36 inches | Room for roots, air, and hilling |
| Water | Usually 1–2 inches weekly | Consistent tuber growth |
| Curing | 2 weeks at 50–60°F | Toughen skins |
| Storage | Dark, humid, ventilated, near 40°F | Slow shriveling and sprouting |
Start with certified seed potatoes
A seed potato is a tuber grown and inspected for planting, not a botanical seed. Each “eye” is a bud capable of producing stems. Certified disease-free stock is one of the most valuable purchases an organic gardener can make. Certification cannot guarantee that a tuber carries no pathogen, but it greatly reduces the chance of starting with viruses or other diseases already present.
Grocery-store potatoes are a poor shortcut. They may have been treated to suppress sprouting, their variety may not suit your climate, and their health history is unknown. Buy from a reputable supplier and select varieties proven in your region.
Choose for the kitchen, climate, and storage
Early varieties mature quickly and suit short summers or places where late blight often arrives late in the season. Midseason and late varieties need more time but often produce heavier crops and keep longer. Waxy potatoes hold their shape in salads and soups; floury varieties make light mash and crisp fries. All-purpose potatoes sit between the two. Where scab, blight, or another disease recurs, local resistance is more valuable than novelty. Remember that resistance is disease-specific, not immunity.
Chitting and cutting seed potatoes
Chitting means encouraging short, sturdy sprouts before planting. It can give early potatoes a head start in cool climates, but it is optional. Three or four weeks before planting, arrange tubers eye-end up in trays in a bright, cool, frost-free room. Indirect light makes compact green or purple sprouts; warmth and darkness create long, pale shoots that snap easily.
Small seed potatoes can be planted whole. Cut larger ones into blocky pieces weighing roughly 1½–2 ounces, each with at least one healthy eye. Use a clean knife and let the surfaces dry in a ventilated place for a day or two. This brief callusing period is particularly helpful when soil is cool or moist. Tiny pieces lack the stored energy for a vigorous start.
Prepare loose, well-drained soil
Potatoes form on underground stems called stolons. Dense clay, standing water, and stones work against clean, well-shaped tubers. Choose full sun and ground that drains after rain. A raised bed or broad ridge is often better than trying to amend a chronically wet patch.
Test the soil before guessing at fertility or pH. Potatoes generally grow well in moderately acidic soil, roughly pH 5.0–6.5. Conditions toward the acidic side can discourage common scab, but repeatedly lowering pH without a test can create nutrient problems for this crop and those that follow.
Mix in finished compost to improve structure. Avoid fresh manure immediately before potatoes; it may be overly rich, can aggravate scab in some soils, and is subject to food-safety waiting periods. Too much nitrogen produces magnificent vines while delaying tubers. Aim for balanced fertility, not maximum foliage.
Working in limited space? Our permaculture guide for small spaces helps fit food crops into a productive 100–500 square-foot plan.
How to grow potatoes organically step by step
1. Wait for workable soil
Plant when the ground is no longer frozen or waterlogged and has warmed to around 45°F. Potato shoots tolerate cool conditions but can be damaged by a hard frost. Planting into cold mud rarely produces an earlier crop; it simply gives seed pieces longer to rot. Mild-winter regions have very different schedules, so use soil condition—not a calendar date—as your guide.
2. Plant at the right depth and spacing
Set seed pieces 3–5 inches deep, eyes facing upward when visible. Space plants 10–12 inches apart and rows 30–36 inches apart. Close spacing tends to yield more small tubers; extra room favors fewer, larger ones. Leave enough space between rows to borrow soil for hilling.
3. Hill before tubers see light
When shoots stand roughly 6–12 inches tall, draw loose soil around them while leaving the upper leaves exposed. Repeat once or twice, building a broad ridge with about 6–8 inches of added cover. Straw or chopped leaves can supplement soil, but inspect after wind or rain for gaps.
Hilling does not force every variety to stack potatoes high up the stem. Its essential jobs are keeping tubers dark, suppressing weeds, and supporting stems. Light-exposed tubers turn green and may contain elevated glycoalkaloids. Do not eat potatoes that are extensively green, bitter, or heavily sprouted.
4. Water consistently
Reliable moisture matters most as tubers begin forming and bulking, commonly from budding and flowering onward. Rain plus irrigation totaling 1–2 inches per week is a useful starting point, not a rigid rule. Sandy soil and hot wind demand more frequent checks; clay and cool weather demand fewer.
Check beneath the mulch before watering. Moisten the root zone, then let air return to the soil. Cycles of drought and flooding can lead to misshapen tubers, cracking, or hollow heart. Drip irrigation keeps foliage drier than sprinklers. Reduce watering as vines yellow and stop before harvest so skins set and soil becomes workable.
5. Feed the soil, not the foliage
Compost is a sound foundation, but not a precise fertilizer prescription. A test may show that phosphorus or potassium is already abundant. If nutrients are needed, use a locally permitted organic fertilizer at its labeled rate and side-dress beside the row. Pale growth may indicate a shortage, but also cold roots, waterlogging, disease, or unsuitable pH. Diagnose before adding more.
6. Weed early and mulch thoughtfully
Shallow cultivation while plants are young prevents weeds becoming competitors. Once the canopy closes, hand-pull near stems so you do not spear tubers. A 2–4 inch organic mulch moderates temperature and evaporation, though permanently wet mulch can shelter slugs or rodents. Lift it occasionally and look.
Organic pest and disease control
The organic approach is prevention plus observation. Walk the rows twice a week and turn over leaves. A small cluster of eggs is easy to remove; a thriving larval population is not.
Colorado potato beetle
Rotate potatoes and their relatives—tomatoes, peppers, and eggplants—away from last year’s plot. Overwintering adults walk toward new plantings, so distance helps more than moving one row. Hand-pick adults and larvae into soapy water and crush orange egg masses under leaves. Row cover installed immediately after planting can exclude early beetles if that ground did not recently grow nightshades. Seal the edges and inspect beneath it.
If pressure exceeds what hand-picking can manage, ask your extension service about currently registered organic products and follow the label. “Natural” does not mean harmless to pollinators, predators, or people.
Early blight and late blight
Early blight often begins as brown lesions with concentric rings on older leaves. Late blight may appear as fast-spreading, water-soaked or dark lesions with pale fungal growth in humid weather. Symptoms vary; a mistaken diagnosis wastes time. Photograph suspicious plants and contact a local plant clinic promptly.
- Start with certified seed and resistant varieties.
- Rotate out of nightshades for three or four years where space permits.
- Provide airflow and water at soil level.
- Destroy volunteer potatoes and cull piles that harbor disease.
- Never save affected tubers for seed.
Late blight moves quickly in cool, humid weather and can threaten neighboring crops. Organic fungicides are preventive rather than curative; use must follow local risk forecasts, label directions, and certification rules.
Scab, wireworms, and slugs
Common scab produces corky patches. Use resistant varieties, rotate, avoid fresh manure, and maintain even moisture while tubers initiate. Do not lime potato ground automatically. Wireworms are common after sod or weedy grass; control grassy weeds and consider delaying potatoes in newly converted lawn. Slugs thrive in dense, damp cover, so reduce hiding places, water mornings, and harvest mature tubers promptly.
Growing potatoes in containers and grow bags
Containers help where drainage is poor, soil is suspect, or digging is difficult. Choose a food-safe container with generous drainage and allow at least 10 gallons of potting mix per plant. Place 4–6 inches of mix at the bottom, plant one seed piece, and add mix in stages as stems grow.
Containers dry quickly at the surface while remaining soggy below, so check several depths and keep drainage holes open. A grow bag is not a route to limitless vertical yield. Many varieties set tubers in a limited zone above the original seed. Root volume, light, and consistent water matter more than an extremely tall “potato tower.”
When and how to harvest
For new potatoes, explore gently beside a plant after flowering begins—often seven or eight weeks after planting, depending on variety and weather. Take a few egg-sized tubers and settle the soil back. Their delicate skins make them a fresh treat, not a storage crop.
For mature potatoes, wait until foliage yellows and dies naturally. In dry weather and healthy ground, another one or two weeks allows skins to firm. Harvest sooner if hard frost, saturation, rodents, or disease threatens. Begin 10–12 inches from the stem with a garden fork and lift from beneath. Set punctured potatoes aside for immediate use. Brush off soil but do not wash storage potatoes, and keep the crop out of direct sunlight.
How to cure and store potatoes
Curing toughens mature skins and seals small abrasions. Keep sound potatoes in darkness with airflow for about two weeks at 50–60°F (10–16°C) and 85–90 percent relative humidity. Do not cure wet, rotten, frozen, green, or badly damaged tubers with the main crop.
Sort again, then store the best potatoes in darkness near 40°F (4°C), with high humidity and ventilation. Paper sacks, ventilated crates, or shallow boxes are better than sealed plastic. Darkness prevents greening, humidity limits shriveling, and airflow releases heat and moisture. Below roughly 38°F, starch converts to sugar and flavor changes; above 50°F, sprouting accelerates.
| Condition | Action |
|---|---|
| Thin-skinned new potatoes | Refrigerate and use soon |
| Sound mature tubers | Cure, then store cool and dark |
| Fork-damaged tubers | Use first if otherwise sound |
| Rotten or leaking tubers | Discard away from storage |
| Green or bitter tubers | Do not eat |
Inspect storage every week or two and remove soft tubers. For low-energy options, read our guides to traditional root clamps and trenches and food preservation without electricity.
Can you save seed potatoes?
You can reserve small tubers from vigorous plants, but home-saved stock may accumulate viruses without obvious symptoms. Mark healthy plants during the season rather than choosing only from the storage pile. Never save from plants with mosaic, leaf curl, unusual stunting, rot, or blight. In areas with high aphid or disease pressure, certified seed each year is the safer investment.
Nine mistakes that reduce the harvest
- Planting supermarket potatoes with an unknown health history.
- Planting in cold, saturated ground.
- Cutting seed pieces too small.
- Adding excess nitrogen and growing leaves instead of timely tubers.
- Letting hills erode and tubers turn green.
- Alternating drought with flooding.
- Ignoring beetle eggs beneath leaves.
- Growing nightshades in the same bed each year.
- Storing damaged and sound potatoes together.
Frequently asked questions
How deep should seed potatoes be planted?
Plant them 3–5 inches deep, then add soil around growing stems. Very deep initial planting can delay emergence in cold ground.
How many potatoes grow from one seed potato?
There is no dependable fixed number. Variety, seed size, stem count, soil, weather, pests, and season length all matter. Record the weight planted and harvested in your own garden instead of relying on optimistic “pounds per pound” promises.
Do potatoes need full sun?
Aim for at least six hours of direct sun; eight is better in moderate climates. Afternoon protection can reduce stress in very hot areas, but deep shade lowers yield.
Can potatoes grow without synthetic fertilizer?
Yes, when the soil provides balanced nutrition. Finished compost, cover crops, rotation, and soil-test-guided organic amendments can support excellent yields. Organic does not mean unfertilized; it means building fertility deliberately.
Should potato flowers be removed?
Usually not. Flowering can indicate tuber formation, although not every variety flowers. The small tomato-like fruits that sometimes follow are toxic and must not be eaten.
The season in one checklist
- Before planting: order certified seed, choose resistant varieties, test soil, and plan rotation.
- At planting: use sound whole tubers or properly sized, callused pieces.
- During growth: hill early, water consistently, weed gently, and inspect twice weekly.
- At maturity: let healthy vines die back, allow skins to set, and dig in dry weather.
- After harvest: separate damaged tubers, cure sound ones, and store them dark, cool, humid, and ventilated.
That is the real rhythm of how to grow potatoes organically: prevent avoidable problems, read the plants, and handle the harvest as carefully as you grew it. If potatoes are part of a larger food plan, try our self-sufficiency land calculator.