
Introduction
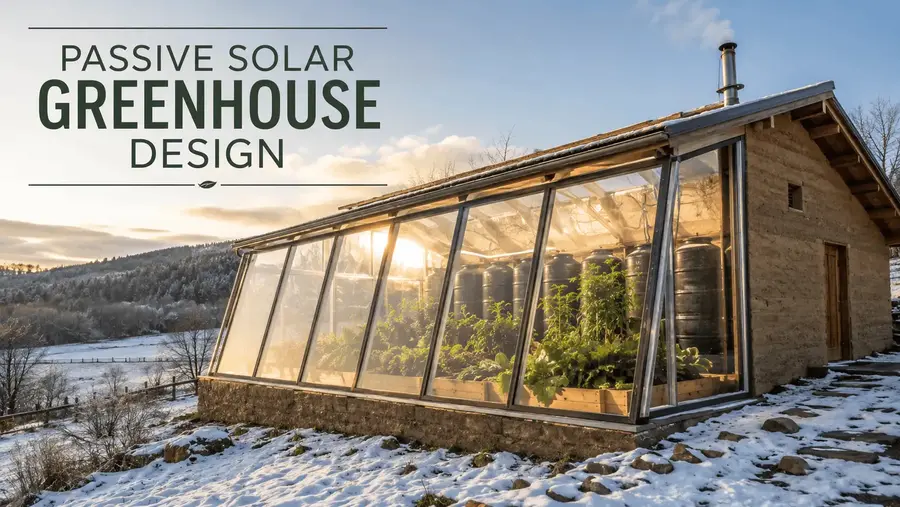
A passive solar greenhouse is a food-growing structure designed to collect, store, and redistribute solar energy without relying on combustion heaters, electric resistance heat, propane burners, or fossil-fuel climate control. Unlike a conventional glass greenhouse, which is often transparent on all sides and loses heat rapidly after sunset, a passive solar greenhouse is engineered like a thermal machine: it has a solar collection face, insulated non-solar walls, thermal mass, controlled ventilation, and biological crop strategies matched to winter light levels.
The goal is not to create a tropical environment in January. The goal is to maintain a stable winter microclimate that stays above freezing, or at least buffers crops from lethal frost, using solar radiation, heat storage, insulation, and careful airflow management.
A conventional greenhouse is mostly a light trap. A passive solar greenhouse is a heat trap.
The engineering challenge is simple to describe and difficult to execute:
Capture enough winter solar energy during the day to offset night-time heat loss through glazing, framing, foundation edges, air leaks, and cold soil.
This guide is written for off-grid homesteaders, DIY builders, and sustainable growers who want year-round food security without artificial heat. The design principles below combine passive solar architecture, greenhouse engineering, thermal physics, and cold-season crop biology.
1. Orientation and Glazing Angles: Capturing Maximum Winter Sun
Why True South Is Non-Negotiable
In the northern hemisphere, the primary glazing face of a passive solar greenhouse should face true south, not magnetic south. In the southern hemisphere, it should face true north.
True south orientation is critical because the winter sun travels low across the southern sky. A greenhouse that faces southeast may warm earlier in the morning but lose valuable afternoon gain. A greenhouse that faces southwest may overheat later in the day but miss the first solar input after a cold night. A greenhouse facing due south receives the most balanced winter solar gain across the day.
Acceptable tolerance:
| Orientation Error | Performance Impact |
|---|---|
| 0–5° from true south | Excellent |
| 5–10° from true south | Usually acceptable |
| 10–15° from true south | Noticeable winter loss |
| More than 15° | Redesign if possible |
For food production in winter, do not orient by a phone compass alone. Magnetic declination can be significant depending on location.
Use one of these methods:
- Find true south with a solar noon shadow line.
- Use a mapping tool with satellite view and true north reference.
- Correct magnetic compass readings for local declination.
- Align the long axis of the greenhouse east-west so the main glazing plane faces south.
The Winter Glazing Angle Rule
The glazing angle controls how directly winter sunlight strikes the transparent surface. Winter sun is low, so a steep south-facing glazing plane captures more energy than a shallow roof.
A practical winter design rule:
Optimum winter glazing angle = local latitude + 15°
Examples:
| Location Latitude | Winter Glazing Angle |
| 35° | 50° |
| 40° | 55° |
| 45° | 60° |
| 50° | 65° |
| 55° | 70° |
This angle places the glazing closer to perpendicular to low winter sun, improving winter collection and reducing reflection losses.
For very snowy climates, steeper glazing also helps shed snow. A shallow roof may collect snow, block light, and turn the greenhouse into an insulated cave exactly when solar gain is needed most.
Glazing Area Ratio
A passive solar greenhouse should not be glass everywhere. The glazing should be concentrated on the solar-facing side.
A practical design range:
South glazing area: 0.25–0.50 ft² of glazing per 1 ft² of floor area
For a 200 ft² greenhouse:
- Moderate climate: 50–70 ft² south glazing
- Cold climate: 70–100 ft² south glazing
- Extreme cold climate: more glazing may help daytime gain, but only if thermal mass and insulation increase with it
More glazing is not automatically better. Every square foot of glazing gains heat during the day and loses heat at night. The design must balance solar collection with heat retention.
Double-Walled Polycarbonate vs. Greenhouse Film
Glazing selection determines three things:
- How much light enters
- How much heat escapes
- How long the structure lasts
| Glazing Material | Approx. R-Value | Light Transmission | Lifespan | Best Use |
| Single polyethylene film | R-0.8 to R-0.9 | 85–90% | 3–5 years | Seasonal tunnels, low-cost builds |
| Double inflated polyethylene | R-1.2 to R-2.0 | 80–90% | 3–5 years | Budget winter growing with blower |
| 6–8 mm twin-wall polycarbonate | R-1.6 to R-1.7 | 80–82% | 10–15+ years | DIY passive solar greenhouses |
| 10 mm twin-wall polycarbonate | R-1.8 to R-2.0 | Around 80% | 10–15+ years | Colder climates |
| 16 mm triple-wall polycarbonate | R-2.4 to R-2.6 | 70–75% | 15+ years | Extreme cold, wind, snow |
| 16 mm five-wall polycarbonate | R-3.0 approx. | 60–65% | 15+ years | Maximum insulation, lower light |
Greenhouse film is cheap and bright, but it is weak thermally. It works for season extension, but it is rarely the best choice for a serious year-round passive solar greenhouse in cold climates unless used as double inflated film with inner row covers.
Polycarbonate transmits less light than clear film or glass, but the insulation gain is usually worth it in winter. For passive solar food production, retained heat is often more limiting than peak midday light.
Best Practical Glazing Choice
For most off-grid growers:
Use 8–10 mm twin-wall polycarbonate in moderate climates and 16 mm triple-wall polycarbonate in cold climates.
In extreme cold climates, add:
- Interior night curtain
- Removable insulated shutter
- Secondary low tunnels over beds
- More thermal mass
- Foundation insulation
- A GAHT or climate battery system
2. Thermal Mass Engineering: The Battery of the Greenhouse
What Thermal Mass Actually Does
Thermal mass stores sensible heat. During sunny hours, dense materials absorb heat. At night, when air temperature drops, the stored heat flows back into the greenhouse.
A passive solar greenhouse without thermal mass overheats during the day and freezes at night. A greenhouse with correct thermal mass has lower daytime peaks and higher night-time lows.
Thermal mass does not create heat. It shifts heat through time.
Thermal mass is not a heater. It is a battery. Solar radiation charges it during the day; night-time heat loss discharges it after sunset.
The Basic Heat Storage Formula
For water:
Stored heat = water volume × temperature swing × heat capacity
Imperial formula:
BTU stored = gallons of water × 8.34 × usable temperature change in °F
Metric formula:
kWh stored = liters of water × 0.001163 × usable temperature change in °C
Example:
A greenhouse has 480 gallons of water barrels. During the day, the water warms from 55°F to 75°F.
- Water volume: 480 gallons
- Temperature swing: 20°F
- Stored heat: 480 × 8.34 × 20 = 80,064 BTU
- Metric equivalent: approximately 23.5 kWh
This is why water is so effective. It stores a large amount of energy in a compact, affordable, non-toxic form.
Water Barrel Ratio
A practical passive solar greenhouse rule:
Use 2–5 gallons of water per square foot of south-facing glazing.
Metric equivalent:
Use approximately 80–200 liters of water per square meter of glazing.
Recommended range:
| Climate | Water per ft² of Glazing | Water per m² of Glazing |
| Mild winter climate | 2 gal/ft² | 80 L/m² |
| Moderate cold climate | 3 gal/ft² | 120 L/m² |
| Cold climate | 4 gal/ft² | 160 L/m² |
| Extreme cold / cloudy climate | 5+ gal/ft² | 200+ L/m² |
Example calculation:
A greenhouse has 120 ft² of south glazing.
| Design Intensity | Calculation | Required Water |
| Moderate | 120 × 3 gal | 360 gal |
| Cold | 120 × 4 gal | 480 gal |
| Extreme cold | 120 × 5 gal | 600 gal |
Since one standard barrel holds 55 gallons:
- 360 gallons = 7 barrels
- 480 gallons = 9 barrels
- 600 gallons = 11 barrels
Placement of Water Barrels
Water barrels only work well if they receive solar energy and can exchange heat with greenhouse air.
Best placement:
- Along the north wall
- Directly behind planting beds
- Painted black or dark blue
- Exposed to sunlight
- Not hidden behind benches
- Sealed to prevent humidity problems
- Structurally braced if stacked
Avoid placing all barrels in a shaded corner. A shaded barrel is storage without charging.
Use food-grade plastic or steel barrels. If stacking two barrels high, secure them with blocking, straps, or a framed rack. A full 55-gallon barrel weighs over 450 lb, so structural support matters.
Sizing Thermal Mass from Heat Loss
The water-to-glazing rule is useful, but advanced builders should also estimate heat loss.
Heat loss through a surface:
Heat loss = U-value × area × temperature difference × time
Imperial:
BTU = U × ft² × Δ°F × hours
Where:
- U = 1 / R-value
- Area = glazing, wall, roof, or foundation surface area
- Δ°F = indoor-outdoor temperature difference
- Time = hours of night
Example:
A greenhouse has 120 ft² of twin-wall polycarbonate with R-1.7.
- U = 1 / 1.7 = 0.59
- Area = 120 ft²
- Temperature difference = 35°F
- Night duration = 14 hours
Heat loss:
0.59 × 120 × 35 × 14 = 34,692 BTU
If the greenhouse has 480 gallons of water and the water can safely release 10°F of heat:
480 × 8.34 × 10 = 40,032 BTU
In this simplified example, the water mass can offset most glazing heat loss for that night. Real designs must also account for air leakage, framing, foundation edges, and cloudy-day undercharging.
Alternative Thermal Mass Options
Earth-Sheltered / Walipini-Style Designs
A Walipini-style greenhouse uses the earth as insulation and thermal mass. The structure is partially sunken, with an insulated north wall and a south-facing glazed roof.
Advantages:
- Reduced wind exposure
- Lower wall heat loss
- More stable soil temperatures
- Protection from extreme cold
Risks:
- Poor drainage can destroy the system
- Cold air can pool at floor level
- Water intrusion increases humidity and disease
- Glazing angle is often too shallow if poorly designed
- Excavation cost can exceed above-ground construction
A Walipini is not automatically superior. It only works when drainage, slope, solar access, and frost protection are engineered correctly.
Dark Stone, Concrete, Cob, and Masonry Walls
Masonry stores heat effectively but releases it more slowly than water. It is best used where sunlight strikes it directly.
Good materials:
- Stone wall
- Concrete block filled with sand or gravel
- Adobe
- Cob
- Rammed earth
- Concrete slab
- Brick pavers
Design rule:
Use dark, sun-exposed masonry for heat absorption; use light reflective surfaces where you need light distribution.
Masonry should not be hidden under wood decking, carpets, insulation, or plant trays. Thermal mass must be exposed to air and sunlight.
Phase-Change Materials
Phase-change materials store heat during melting and release it during solidification. In theory, they are ideal because they can be selected to change phase near crop-safe temperatures.
Advantages:
- High heat storage per volume
- More stable temperature release
- Useful where space is limited
Limitations:
- Higher cost
- Product-specific lifespan
- Encapsulation failure risk
- More complex sourcing
- Harder for DIY builders to repair
For most homesteads, water barrels remain the best thermal mass: cheap, available, safe, measurable, and repairable.
3. Insulating the North, East, and West Walls
Why 360-Degree Glass Is an Engineering Failure
A traditional greenhouse is transparent on all sides because it is designed primarily for light. A passive solar greenhouse is different. It is designed for net winter energy gain.
In winter, north-facing glass receives little direct sun in the northern hemisphere. East and west glass receive some low-angle light, but they also lose heat rapidly. At night, every glazed surface becomes a thermal liability.
A passive solar greenhouse should collect light where the sun is useful and insulate where the sun is not.
A fully glazed greenhouse has high night-time heat loss because glazing has poor insulation compared with a wall. Even good multiwall polycarbonate performs far worse than a properly insulated wall.
A well-designed passive solar greenhouse typically has:
- South-facing glazing
- Solid insulated north wall
- Mostly insulated east and west walls
- Limited east/west glazing only where needed for light or access
- Insulated foundation perimeter
- Tight framing and sealed joints
North Wall Design
The north wall is the backbone of the passive solar greenhouse. It should perform three jobs:
- Stop heat loss
- Reflect light back toward plants
- Support thermal mass, shelves, vents, or storage
Recommended north wall R-values:
| Climate | Recommended North Wall |
| Mild | R-15 to R-20 |
| Moderate cold | R-20 to R-30 |
| Cold | R-30 to R-40 |
| Extreme cold | R-40+ where practical |
For DIY construction, this can be achieved with:
- 2×6 framed wall plus continuous exterior rigid insulation
- Double-stud wall
- Structural insulated panels
- Straw bale wall with moisture-safe detailing
- Insulated concrete form wall
- Earthbag wall with exterior insulation
The interior face should be durable and moisture-resistant. Greenhouses are humid environments, so ordinary drywall is usually a poor choice.
Better interior finishes:
- Exterior-grade plywood sealed with low-VOC coating
- Cement board
- Lime plaster over suitable substrate
- Corrugated metal with condensation control
- FRP panels in wet zones
Reflective Interior Coatings
The north wall should not be mirror-like. Mirror reflection can create glare and uneven hotspots. A matte or satin bright surface is usually better.
Good interior finishes:
- White limewash
- White exterior-grade paint
- Light-colored metal panels
- Reflective but diffuse greenhouse liner
Target:
High reflectance, low glare, moisture resistance, easy cleaning.
This reflects low winter light back onto crop beds and reduces the “dark cave” effect of heavily insulated walls.
East and West Wall Strategy
East and west walls are more complicated because they receive low-angle sun. Some glazing may be useful, especially in shoulder seasons. But excessive east/west glazing increases night heat loss and summer overheating.
Recommended approach:
- Insulate the lower half of east/west walls.
- Use limited upper glazing if needed.
- Place doors on the east or west side only if they can be well sealed.
- Avoid large uninsulated doors.
- Use insulated shutters or curtains for any non-south glazing.
For extreme cold:
Treat east and west glazing as a luxury, not a default.
Foundation Insulation and Frost Protection
Many DIY greenhouse failures start at the foundation. Heat does not only leave through walls and glazing. It also escapes through the ground perimeter.
Cold moves laterally through soil and can freeze the bed edges. This is especially damaging because winter crops rely on root-zone stability more than warm air.
Foundation design goals:
- Stop perimeter heat loss
- Prevent frost heave
- Keep root-zone temperatures stable
- Maintain drainage
- Avoid toxic materials in growing beds
Best practices:
- Place footings below local frost depth where required.
- Install vertical perimeter insulation around the foundation.
- Use horizontal insulation skirts in very cold climates where appropriate.
- Insulate the north-side foundation especially well.
- Separate growing soil from treated lumber or questionable materials.
- Direct roof runoff away from the foundation.
- Use free-draining gravel around exterior edges.
Typical insulation:
| Component | Moderate Climate | Cold Climate |
| Vertical perimeter insulation | R-5 to R-10 | R-10 to R-20 |
| North stem wall | R-10+ | R-20+ |
| Under-path insulation | Optional | Useful |
| Bed insulation | Usually no | Only if soil connection is not needed |
Do not over-insulate the entire growing bed from the earth unless the design requires it. Soil connection can help stabilize temperature and biology. The priority is usually perimeter insulation, not isolating the whole greenhouse from the ground.
4. Ventilation, Climate Control, and GAHT Systems
The Overheating Problem
Passive solar greenhouses are designed for winter heat capture. That same efficiency can cause dangerous overheating on sunny days.
Even when outdoor air is cold, a sealed greenhouse can exceed plant-safe temperatures by midday. Winter greens may tolerate cold, but they can be damaged by sudden heat spikes, humidity buildup, and poor airflow.
Critical risks:
- Bolting of greens
- Fungal disease
- Weak seedlings
- Condensation on glazing
- Aphid and mite outbreaks
- Pollination failure in warm-season crops
- Structural moisture damage
A passive solar greenhouse needs controlled ventilation as much as it needs insulation.
Non-Electric Wax-Piston Roof Vents
For off-grid resilience, automatic wax-piston vents are one of the highest-value upgrades. They open when temperature rises and close when temperature falls, without electricity.
How they work:
- Wax expands as it warms.
- Expansion pushes a piston.
- The piston opens the vent.
- Wax contracts as it cools.
- The vent closes automatically.
Advantages:
- No wiring
- No battery
- No thermostat
- No daily manual venting
- Fail-safe for sunny winter days
Best placement:
- High roof vents for hot air exhaust
- Low intake vents on the opposite side
- Cross-ventilation path through the crop zone
- Insect mesh where needed
- Wind-protected but functional openings
Vent-to-Floor Area Ratio
A practical natural ventilation starting point:
Total openable vent area should equal at least 15–20% of greenhouse floor area.
For fully passive ventilation in sunny climates:
Design for 20–40% openable area if overheating risk is high.
Example:
A greenhouse has 200 ft² of floor area.
| Ventilation Intensity | Required Openable Area |
| Minimum | 30 ft² |
| Better passive design | 40 ft² |
| Hot/sunny climate | 60–80 ft² |
Distribute vents vertically:
- Low intake vents: cooler air enters
- High roof/ridge vents: hot air exits
- The height difference creates stack effect
- Wind improves exchange when vents are placed correctly
One large vent is usually worse than balanced low and high openings.
Humidity Control
Winter humidity is a hidden failure point. Plants transpire, soil evaporates, and warm daytime air holds moisture. At night, surfaces cool and condensation forms.
Control strategies:
- Vent briefly on sunny days, even in winter.
- Avoid overwatering.
- Use drip irrigation instead of overhead watering.
- Mulch paths, not wet foliage.
- Keep airflow around dense crops.
- Use gravel paths or dry thermal mass zones.
- Remove diseased leaves immediately.
The goal is not a sealed terrarium. The goal is a buffered microclimate with controlled air exchange.
GAHT and Climate Battery Systems
GAHT means Ground to Air Heat Transfer. It is also called a climate battery or subterranean heating and cooling system.
The concept:
- During sunny days, greenhouse air becomes warm and humid.
- A fan pulls this hot air into buried pipes under the greenhouse.
- Heat transfers from air into soil, gravel, or rock.
- Moisture condenses underground, releasing additional latent heat.
- The soil profile becomes a thermal battery.
- At night, stored heat moderates greenhouse temperature.
A GAHT system does not create heat. It stores excess daytime heat that would otherwise be vented away.
Typical design parameters:
| Component | Practical Range |
| Pipe depth | 2–4 ft below growing surface |
| Pipe diameter | 4–6 in for small DIY systems |
| Pipe spacing | 2–3 ft apart |
| Pipe slope | 1–2% toward drainage point |
| Air intake | High warm zone |
| Air outlet | Low or central crop zone |
| Fan | Low-watt inline or blower fan |
| Power source | Small PV + battery system possible |
| Soil battery | Moist mineral soil or gravel-rich subsoil |
GAHT systems work best when:
- The greenhouse has enough insulation
- Solar gain is strong
- Soil below the greenhouse is not waterlogged
- Pipes drain condensation
- The system runs during warm daytime peaks
- The fan moves enough air without excessive energy draw
Failure points:
- Pipes installed too shallow
- No drainage
- Poor soil contact
- Undersized fan
- Unsealed pipe joints
- Air short-circuiting from inlet to outlet
- Expecting GAHT to compensate for bad glazing or no insulation
A climate battery is not a substitute for proper passive solar design. It is an amplifier.
5. Technical Specifications Matrix
| Design Parameter | Extreme Cold Climates -10°C / 14°F and Below | Moderate Climates |
| Primary orientation | True south, max 5–10° error | True south, max 10–15° error |
| Long axis | East-west | East-west preferred |
| Winter glazing angle | Latitude + 15° | Latitude + 10–15° |
| Glazing layers | 16 mm triple-wall polycarbonate, five-wall polycarbonate, or twin-wall plus night curtain | 8–10 mm twin-wall polycarbonate or double inflated polyethylene |
| Single film suitability | Not recommended | Only for budget season extension |
| South glazing area | 0.30–0.50 ft² per ft² floor, only with sufficient mass | 0.25–0.40 ft² per ft² floor |
| Thermal mass volume | 4–5+ gal water per ft² glazing | 2–3 gal water per ft² glazing |
| Metric thermal mass | 160–200+ L water per m² glazing | 80–120 L water per m² glazing |
| North wall R-value | R-30 to R-40+ | R-20 to R-30 |
| East/west walls | Mostly insulated, minimal glazing | Partly insulated, limited glazing acceptable |
| Foundation insulation | R-10 to R-20 perimeter, below frost influence | R-5 to R-10 perimeter |
| Vent-to-floor area ratio | 15–25% minimum; 20–30% safer for sunny sites | 15–20% minimum; 20–40% for hot/sunny regions |
| Roof vents | Automatic wax-piston vents strongly recommended | Automatic vents recommended |
| Inner crop protection | Low tunnels + row cover required for deep winter | Row cover during cold snaps |
| GAHT / climate battery | Highly recommended | Optional but useful |
| Winter crop goal | Survival and harvest of hardy greens | Continuous harvest of hardy greens |
| Warm-season crops in January | Not realistic without heat | Usually not realistic without heat |
6. Crop Selection for Unheated Winter Harvests
Engineering Cannot Replace Biology
The biggest mistake in unheated greenhouse design is expecting summer crops in winter. Tomatoes, cucumbers, peppers, basil, and eggplants are warm-season crops. They need warmth, strong light, and long days.
Trying to grow tomatoes in January without heat is usually a design failure disguised as ambition.
The correct winter strategy is:
Grow crops that tolerate cold, low light, and slow metabolism. Harvest through winter; do most growth before deep winter.
In the darkest weeks, many crops do not grow much. They hold. This is why timing is as important as greenhouse design.
The Winter Harvest Principle
For unheated winter production:
- Start crops early enough in late summer or autumn.
- Let them reach harvestable size before deep winter.
- Protect them through the low-light period.
- Harvest slowly.
- Restart rapid growth as day length returns.
A useful planning rule:
Winter greenhouse crops should be nearly mature before day length drops below 10 hours.
Below that threshold, growth slows dramatically. The greenhouse protects the crop; it does not replace the sun.
Best Frost-Hardy Crops
| Crop | Winter Use | Notes |
| Spinach | Main winter leaf crop | Excellent cold tolerance, regrows well |
| Kale | Leaf harvest | Very hardy, sweeter after frost |
| Claytonia / miner’s lettuce | Salad green | Thrives in cool, low-light conditions |
| Mâche / corn salad | Winter salad | Extremely cold-tolerant, slow but reliable |
| Asian greens | Leaf harvest | Tatsoi, mizuna, komatsuna perform well |
| Arugula | Salad green | Fast in autumn, holds in winter |
| Chard | Leaf harvest | Less hardy than spinach/kale but useful |
| Parsley | Herb | Very cold-tolerant once established |
| Cilantro | Cool-season herb | Bolts in heat, useful in winter |
| Scallions | Cut-and-come-again | Reliable in protected beds |
| Leeks | Standing crop | Hardy, space-efficient |
| Carrots | Root storage in soil | Best when mature before winter |
| Radishes | Shoulder-season crop | Better autumn/spring than deep winter |
Crops That Usually Fail Without Heat in Winter
Avoid planning deep-winter production around:
- Tomatoes
- Peppers
- Cucumbers
- Melons
- Basil
- Eggplant
- Beans
- Sweet corn
- Summer squash
These crops may survive in a passive solar greenhouse during shoulder seasons, but they are not reliable deep-winter crops without supplemental heat and light.
Secondary Row Covers Inside the Greenhouse
A greenhouse is the first layer of protection. Low tunnels inside the greenhouse create a second microclimate.
This is one of the most effective low-cost frost strategies.
Layering system:
- Exterior greenhouse shell
- Interior low tunnel hoops
- Floating row cover
- Optional clear plastic layer during severe cold
- Thermal mass nearby
- Mulched or protected root zone
The inner tunnel reduces radiant heat loss from crop leaves to the cold glazing. It also traps a smaller volume of air around the crop, which is easier to keep stable.
Best materials:
- Wire hoops
- PVC or fiberglass hoops
- Lightweight row cover
- Medium-weight frost cloth
- Clear plastic only with daytime venting
- Sandbags or boards to seal edges
Important:
Never leave sealed plastic low tunnels closed on sunny days. They can overheat quickly even in winter.
Bed Layout for Winter Performance
Best winter bed placement:
- Cold-hardy greens near outer edges
- Tender crops near water barrels
- Seedlings on shelves above or near thermal mass
- Paths designed as heat-absorbing surfaces
- Avoid beds directly against uninsulated glazing
- Use north wall shelves only if they do not shade crops
Dark paths made of stone, brick, or gravel can contribute to thermal storage. Light-colored vertical surfaces help distribute winter light.
Soil Biology in Cold Conditions
Healthy soil improves resilience, but winter soil biology slows down. Do not overload beds with unfinished compost in winter. It can create ammonia, fungal pressure, or uneven nutrient release.
Winter soil strategy:
- Prepare beds before cold weather
- Use finished compost
- Avoid heavy nitrogen late in the season
- Keep soil moist but not saturated
- Use mulch lightly around established crops
- Avoid disturbing roots during deep cold
- Water in the morning on sunny days
Cold roots plus saturated soil are a common cause of winter crop failure.
Final Verdict: True Autonomy Through Intelligent Design
A passive solar greenhouse is not a normal greenhouse with extra barrels inside. It is a complete energy system.
The highest-performing designs combine:
- Accurate true-south orientation
- Winter glazing angle based on latitude
- Insulated north, east, and west walls
- Correct water-to-glazing thermal mass ratio
- Foundation insulation below frost influence
- Airtight but controllable ventilation
- Automatic non-electric roof vents
- Optional GAHT or climate battery storage
- Frost-hardy crop selection
- Secondary protection over winter beds
Long-term return on investment:
- Zero routine heating bills
- Lower dependence on fossil fuels
- More reliable winter harvests
- Better food security during supply disruptions
- Longer growing season without grid dependence
- Stronger climate resilience
- More durable structure than temporary tunnels
- Better integration with homestead water, compost, and permaculture systems
The passive solar greenhouse sits at the intersection of architecture and permaculture. Architecture shapes the energy flows. Permaculture shapes the biological flows. When both are designed together, the result is not just a greenhouse. It is a year-round food security system powered by sunlight, soil, water, and intelligent design.