
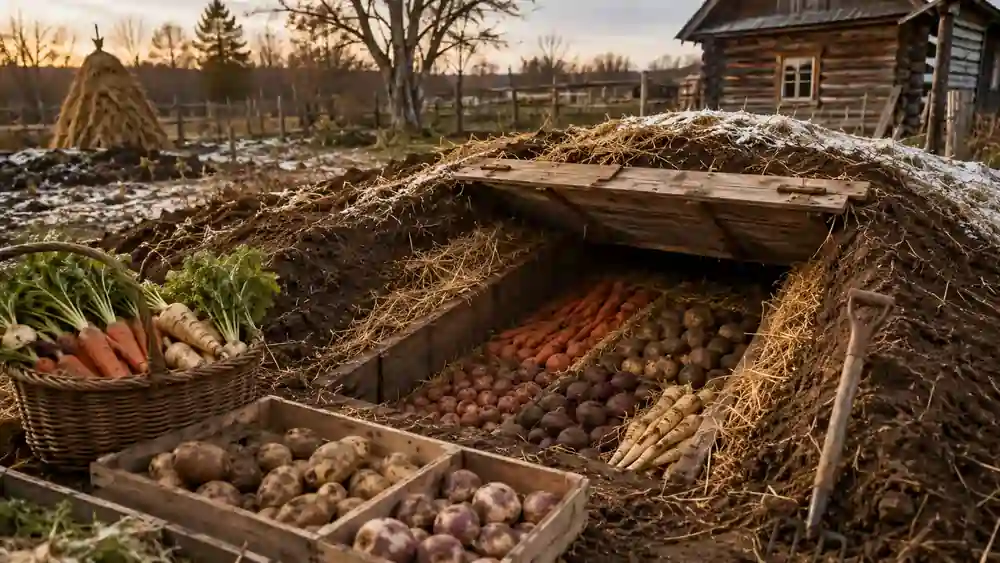
Knowing how to build a root cellar gives you cool, humid, electricity-free storage for potatoes, carrots, apples, cabbage and more, often for four to eight months. A root cellar uses the stable temperature of the earth and simple ventilation to hold produce just above freezing, which slows spoilage without a refrigerator.
This guide shows how to build a root cellar step by step: how to pick a site, three proven designs, how to size the ventilation, the temperature and humidity targets for each crop, a materials and cost table, and a monthly management checklist. It is written for small off-grid homesteads, but the principles apply to any garden.
Quick answer: how to build a root cellar
- Choose a well-drained, shaded site, ideally on a north-facing slope or beside a cool wall.
- Pick a design: in-ground (pit), hillside or basement corner.
- Excavate or build below frost depth so soil temperature stays stable.
- Build walls and a roof that are strong enough for the soil load, with a vapour-open interior.
- Install a low intake vent and a high exhaust vent, each with a damper and mesh.
- Add a door (insulated) and shelving that keeps produce off the floor.
- Monitor temperature and humidity with a thermometer and hygrometer, then adjust vents.
Site selection: slope, drainage and soil
The best site is dry, shaded and close to the kitchen. Avoid hollows where water collects, and avoid spots below the groundwater level. A north-facing slope reduces solar heating of the soil. Well-draining soil such as sandy loam or gravel makes an easier cellar than heavy clay, which holds water and pushes on walls.
- Check that the water table stays well below the floor in spring and wet seasons.
- Dig a test hole 1.5–2 m deep and watch whether water seeps in after a rain.
- Keep the cellar away from tree roots, septic fields and drains.
- Plan access so you can carry heavy crates in winter without ice and snow in the way.
- Check local building rules for buried structures and retaining walls.
Three root cellar designs
1. In-ground pit or barrel cellar
The simplest option is a pit or a buried barrel, drum or insulated box. It is cheap and quick but holds only a small amount of produce and access is awkward in winter. It is best for apples, carrots and beets stored in damp sand.
2. Hillside or earth-sheltered cellar
A cellar dug into a slope with a concrete block, stone or poured concrete front wall is the classic design. The earth covers the roof and sides, which gives excellent temperature stability and easy walk-in access. It needs good drainage and an engineered roof, so plan the structure carefully.
3. Basement corner root cellar
If your house has a basement, a corner room with two outside walls can be insulated from the warm house and fitted with a window or duct vent to the outside. It is the most convenient and the least expensive option, but it takes more work to keep the temperature low in a heated house.
| Design | Capacity | Cost level | Pros | Cons |
|---|---|---|---|---|
| In-ground pit / barrel | Small | Low | Cheap and simple | Awkward access, limited volume |
| Hillside / earth-sheltered | Large | Medium–high | Stable temperature, walk-in | Needs slope and structural work |
| Basement corner | Medium | Low–medium | Convenient, close to the kitchen | Warm house raises temperature |
Ventilation: intake and exhaust sizing
A root cellar needs fresh air to remove ethylene from fruit and to control humidity and temperature. Use two vents: a low intake that draws in cool outside air and a high exhaust on the opposite side that lets warm air and gases escape. As air warms inside, it rises and leaves through the high vent, and cool air is pulled in below.
- Small cellar (up to about 6 m²): two pipes of 100 mm (4 in) diameter.
- Larger cellar (up to about 12 m²): two pipes of 150 mm (6 in) or two 100 mm pipes per side.
- Fit each vent with an insect screen, a rodent mesh and a damper you can close.
- Make the exhaust pipe terminate close to the ceiling and the intake pipe near the floor.
- Place the outside end of the intake in shade and away from snow drifts.
Open the vents at night and in cool weather, and close them during very hot days or hard frost. Adjusting the vents is the main way you control temperature in a cellar without electricity.
Temperature and humidity targets by crop
| Crop | Temperature | Relative humidity | Notes |
|---|---|---|---|
| Potatoes | 4–7 °C | 90–95 % | Keep dark; avoid frost and apples nearby |
| Carrots, beets, parsnips | 0–2 °C | 90–95 % | Pack in damp sand or sawdust |
| Cabbage | 0–2 °C | 90–95 % | Strong smell; store in separate area |
| Apples | 0–2 °C | 85–90 % | Separate from vegetables because of ethylene |
| Onions, garlic | 0–2 °C | 60–70 % | Dry; hang in nets, keep away from damp crops |
| Winter squash, pumpkins | 10–13 °C | 50–70 % | Warmer, drier spot; do not stack |
A basic min/max thermometer and a hygrometer cost little and are the most useful tools in a cellar. If humidity is too low, add a tray of water or damp sand. If it is too high, increase ventilation and check for leaks.
To learn more about low-tech winter storage, read our guide to traditional root clamps and trenches and our overview of food preservation without electricity.
Materials and costs
| Material | Use | Approximate cost level |
|---|---|---|
| Concrete blocks or stone | Walls | Medium |
| Poured concrete or treated timbers | Floor, roof support | Medium–high |
| Waterproof membrane and gravel drainage | Keeps walls dry | Low–medium |
| Insulated door | Seals the cellar | Medium |
| Ventilation pipes, mesh, dampers | Airflow control | Low |
| Wooden shelves and crates | Storage | Low |
| Thermometer, hygrometer | Monitoring | Low |
Costs vary greatly with region and with whether you dig the cellar yourself. Reusing materials such as timber, stone and old blocks can cut the cost sharply. Always have a qualified person check the roof structure of an earth-covered cellar.
Shelving, bins and rodent-proofing
- Use slatted wooden shelves that allow air flow and keep produce off the floor.
- Store root crops in ventilated crates, damp sand or sawdust, not in plastic bags.
- Cover floor drains and all vents with fine metal mesh to keep rodents out.
- Seal gaps around pipes and doors with metal flashing or concrete.
- Use metal bins for grains and nuts.
- Keep the floor clean and remove rotting produce immediately.
Monthly management checklist
- Autumn: clean and dry the cellar, check vents and mesh, then fill when nights are cool.
- Early winter: open vents at night, close in hard frost, record the temperature.
- Mid-winter: check produce weekly and remove anything soft or mouldy.
- Late winter: reduce ventilation as outdoor temperatures start to rise.
- Spring: empty the cellar, wash the shelves and let it air out for a few weeks.
Related guides
Frequently Asked Questions
How deep should a root cellar be?
Soil temperature becomes stable at about 1.5–2 m below ground, so aim for most of the cellar to sit below that depth or be well covered with earth. Always dig below the frost line in your area.
How much does it cost to build a root cellar?
A simple pit or barrel cellar can cost very little, while a walk-in hillside cellar with concrete walls can cost several thousand dollars. Costs depend on materials, labour and local conditions.
What should not be stored together in a root cellar?
Keep apples and other ethylene-producing fruit away from potatoes, and keep strongly smelling crops like cabbage and onions separate from fruit.
Do I need electricity for a root cellar?
No. A well-designed cellar relies on passive ventilation and the stable temperature of the ground. A battery thermometer is enough for monitoring.
Sources and further reading
Now you know how to build a root cellar that stays cool, humid and dark. Start small, watch the temperature through the first winter and adjust the vents.
1 thought on “How to Build a Root Cellar: Design, Ventilation and What to Store”
Comments are closed.