
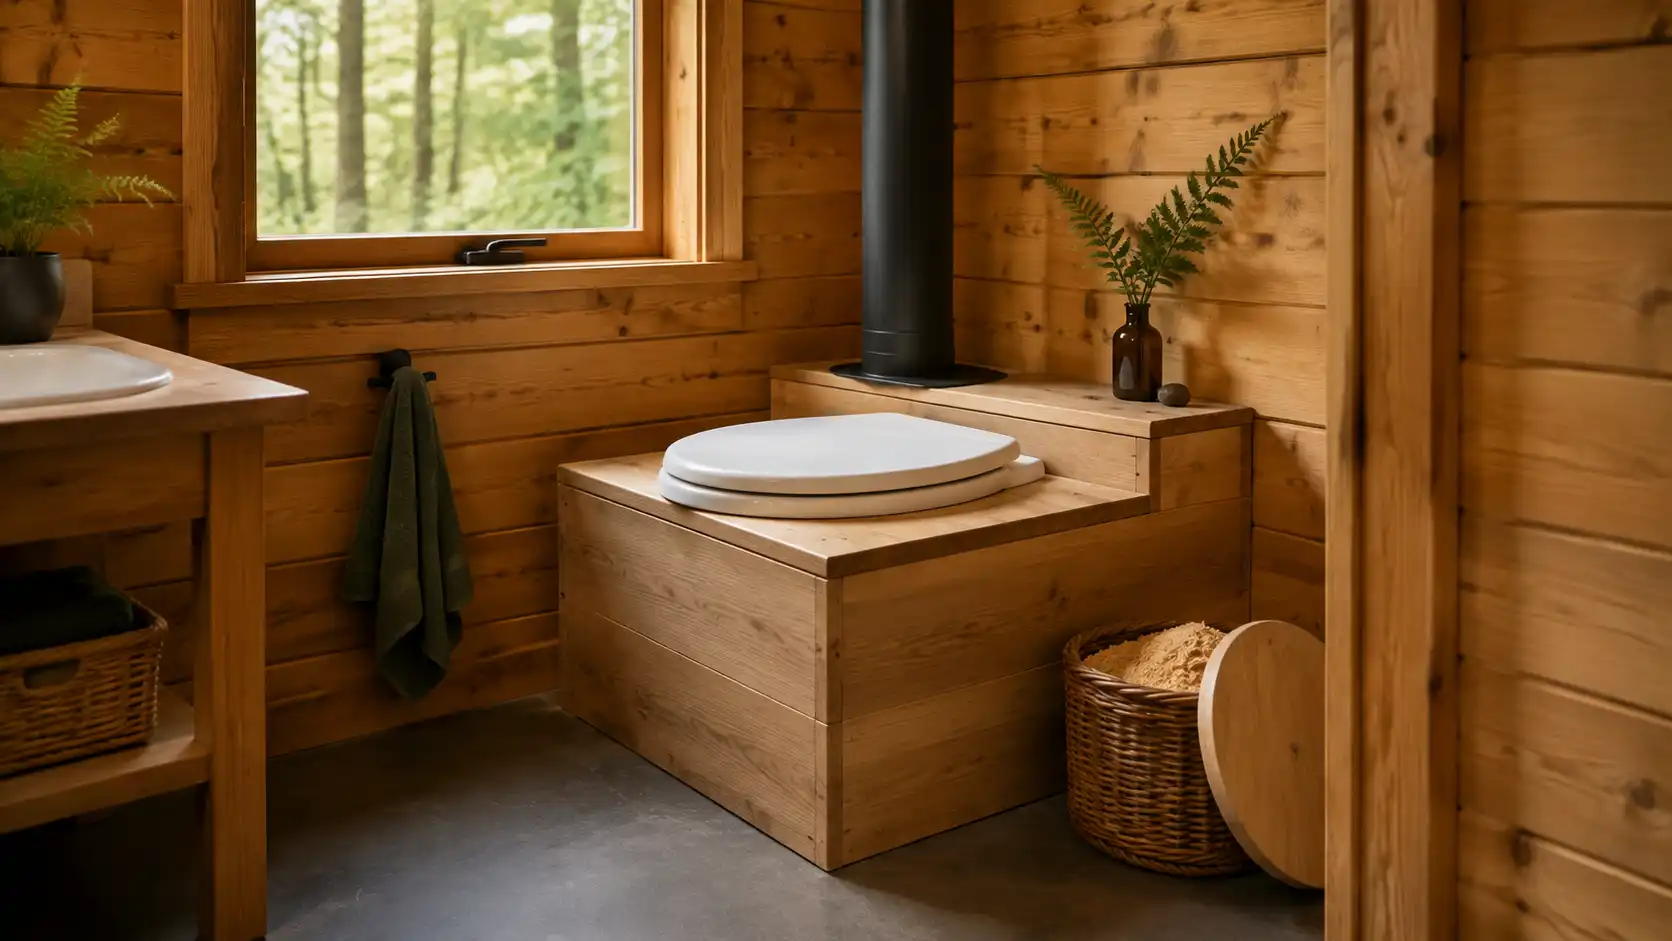
A DIY composting toilet system can reduce water use and provide a practical sanitation option for an off-grid cabin, tiny house, workshop or seasonal homestead. But a successful system is more than a bucket beneath a toilet seat. It must control liquids, maintain airflow, contain waste safely and provide enough time for biological decomposition.
This guide explains the main composting toilet designs, the materials commonly used, ventilation requirements, routine maintenance and the mistakes that cause odor, flies and excess moisture.
Important: Human waste can contain disease-causing organisms. A homemade toilet should not be treated as a certified sanitation system, and material removed from it should not be assumed safe merely because it looks like compost. Before building or installing any system, check building, plumbing, wastewater and public-health rules with the authority responsible for your property. Some locations require an approved or independently certified unit, a permit, an additional greywater system or a conventional wastewater solution.
Quick Answer: What Is the Simplest DIY Composting Toilet System?
The simplest design is a dry collection toilet with a removable solids container, a tight-fitting seat, a vented enclosure and a dry carbon-rich cover material such as wood shavings. A urine-diverting insert can keep most liquid out of the solids container and reduce the moisture that commonly causes odor.
However, collection and composting are not the same process. In many simple systems, the container beneath the toilet only collects material. The contents must then be transferred—where legally permitted—to a separate, secure composting or treatment process for an extended period.
For full-time residential use, a purpose-built, correctly sized and independently certified composting toilet is often more predictable than a homemade collection system. NSF evaluates non-liquid-saturated treatment systems under NSF/ANSI Standard 41, including capacity, odor and bacterial-performance requirements.
How Does a Composting Toilet Work?
A composting toilet aims to create conditions in which aerobic microorganisms gradually break down organic material. Successful operation depends on balancing four factors:
- Oxygen: Airflow supports aerobic decomposition and helps prevent anaerobic odor.
- Moisture: The contents should be damp enough for biological activity but not saturated.
- Carbon: Dry plant-based material absorbs moisture, adds structure and balances nitrogen-rich waste.
- Time: Pathogen reduction and decomposition do not happen instantly.
A properly operating system is not simply storing sewage in a sealed container. It manages moisture and airflow while preventing insects, leakage and direct human contact.
The U.S. Environmental Protection Agency includes composting toilets among its decentralized wastewater technology resources, but local acceptance and installation requirements still vary. The EPA’s water-efficiency technology resources are a useful starting point, not a substitute for local approval.
Composting Toilet vs. Bucket Toilet
These terms are often used interchangeably, but they describe different functions.
| System | Primary function | Typical location of decomposition | Key limitation |
|---|---|---|---|
| Basic bucket toilet | Collects solids and liquids | Usually elsewhere | Small capacity and frequent handling |
| Urine-diverting dry toilet | Separates most urine from solids | Separate treatment or composting area | Diverter must be positioned and cleaned correctly |
| Self-contained composting toilet | Collects and processes waste in one fixture | Inside the toilet body | Limited capacity; may need power and frequent maintenance |
| Central or split system | Toilet connects to a larger chamber | Remote chamber below or beside the building | More space, planning and structural work required |
Calling a collection bucket a “composting toilet” does not make the material inside finished compost. A responsible design should clearly identify where collection ends and further treatment begins.
Choose the Right System Type
1. Simple Contained Collection System
This arrangement uses a removable container inside a washable enclosure. A carbon cover material is added after use, and the container is replaced before it becomes difficult to handle.
It is most appropriate for:
- Occasional cabin use
- Workshops and outbuildings
- Temporary situations where legal disposal is available
- Emergency backup sanitation
Its advantages are low cost and simple construction. Its disadvantages include small capacity, frequent handling and the risk that users mistake collected material for completed compost.
2. Urine-Diverting Dry Toilet
A urine-diverting dry toilet, often abbreviated UDDT, directs urine into a separate drain or removable container while solids enter a ventilated chamber.
Separating urine can:
- Reduce liquid entering the solids container
- Slow the rate at which the solids container fills
- Make odor and moisture easier to control
- Reduce the amount of cover material required
The urine side still requires a legal management plan. It must not be allowed to overflow, contaminate groundwater or discharge into an unapproved location.
3. Self-Contained Manufactured Unit
These fixtures place the collection and treatment chamber in the bathroom. Depending on the model, they may use a small electric fan, heater or mixing mechanism.
This is not a fully DIY option, but it may be the better choice when:
- The toilet will be used daily
- Space below the floor is unavailable
- Local approval requires a listed or certified product
- Predictable capacity and manufacturer support are important
Check the stated daily and peak capacity rather than selecting a unit based only on physical size.
4. Central Composting Chamber
A central system uses a larger chamber located below the toilet or in an adjacent service area. Waste moves into the chamber through a chute, while a vent maintains negative pressure and carries air above the roof.
Central systems offer greater capacity and less frequent removal, but they require more space, structural planning and safe maintenance access. A DIY central chamber should not be improvised without understanding drainage, leachate containment, ventilation and local approval requirements.
Materials for a Simple Vented Collection Toilet
The exact materials depend on the approved design and whether urine diversion is used. A basic enclosure may require:
| Component | Purpose | Selection notes |
|---|---|---|
| Strong toilet enclosure | Supports the user and contains the collection vessel | Use washable, moisture-resistant surfaces |
| Toilet seat with lid | Provides a stable, closable opening | Ensure it aligns fully with the container |
| Removable collection container | Holds solids securely | Smooth, non-corroding and easy to clean |
| Urine diverter, optional | Directs most liquid away from solids | Must fit the seat geometry and user position |
| Vent connection | Draws air from the enclosure | Seal around joints to avoid bathroom leakage |
| Vertical vent pipe | Carries moist air above the roof | Keep the route as straight as practical |
| Low-power inline fan, optional | Maintains continuous airflow | Useful when natural draft is weak |
| Insect screen | Blocks flies at the vent outlet | Must not restrict airflow excessively |
| Carbon cover material | Absorbs moisture and adds structure | Store dry in a lidded container nearby |
| Secondary containment tray | Catches accidental leakage | Choose a washable, non-absorbent tray |
| Gloves and cleaning supplies | Reduce exposure during service | Keep them dedicated to toilet maintenance |
Avoid using a container that previously held hazardous chemicals. Do not rely on thin liners as the only protection against leakage, and do not build a seat platform that can tip or collapse.
Best Cover Materials for a Composting Toilet
Dry cover material helps absorb moisture, reduce exposed surface area and maintain air spaces. Common options include:
- Fine or medium wood shavings
- Chopped dry leaves
- Hemp or similar plant bedding
- Coco coir prepared according to the product instructions
- A blended dry bulking material intended for composting toilets
Very fine sawdust can pack tightly and restrict airflow when used alone. Large wood chips may create structure but provide poor surface coverage. The ideal material is dry, absorbent and loose enough to retain air spaces.
Do not use treated or painted wood waste, glossy paper, plastic-containing litter, chemical deodorizer or ash from unknown materials. Avoid adding large quantities of soil; it is heavy, can reduce air space and does not solve a moisture problem.
How to Build a Simple DIY Composting Toilet Enclosure
The following steps describe a contained collection fixture, not a complete certified wastewater-treatment system.
Step 1: Confirm What Is Allowed
Contact the local building or environmental health authority before purchasing materials. Ask specifically about:
- Composting toilet approval
- Required product certification
- Blackwater and greywater rules
- Permitted disposal or secondary treatment
- Setbacks from wells, surface water and property boundaries
- Inspection requirements
Written confirmation is more useful than relying on a general statement that composting toilets are “legal” in the region.
Step 2: Select the Container and Service Route
Choose a container that fits beneath the seat without leaving gaps around the opening. Plan how it will be removed without carrying it through food-preparation areas.
The container should remain upright during use and transport. Provide enough clearance to lift it without scraping the seat platform or spilling the contents.
Step 3: Build a Stable, Washable Enclosure
Construct the enclosure so it supports the expected load without flexing. Seal exposed edges and joints against moisture. The top should allow the seat to close properly, and the collection container must remain centered beneath the opening.
Include an access panel that can be opened without dismantling the entire toilet. A secondary containment tray beneath the container makes small leaks easier to detect and clean.
Step 4: Install Urine Diversion if Used
Mount the diverter at the front of the seat opening according to its instructions. Test alignment with clean water before the toilet is used.
Route liquid through compatible tubing into a secure container or approved system. Use smooth, accessible pipework with enough slope to drain. Avoid low points where liquid can remain and create mineral deposits or odor.
Step 5: Add the Ventilation Connection
Connect the enclosure or solids chamber to a vertical vent. Seal the pipe penetration so air is pulled from the toilet enclosure rather than from gaps in the bathroom.
The vent should terminate outdoors in a location that prevents exhaust from re-entering windows, roof openings or air intakes. Roof penetrations and weatherproofing should follow applicable building practice.
Step 6: Test Before Use
Check that:
- The enclosure does not move or tip
- The container is correctly aligned
- The urine line drains without leaking
- The fan, if fitted, runs continuously and quietly
- Air moves into the toilet opening and toward the vent
- The access panel closes securely
- The vent outlet is screened against insects
Begin with light use and inspect the system frequently during the first weeks.
Composting Toilet Ventilation
Ventilation is one of the most important parts of odor control. The objective is to maintain gentle airflow from the room into the toilet and then outdoors.
Natural Draft
A vertical vent warmed by the sun may develop a natural upward draft. Natural ventilation works best when the pipe:
- Rises mostly vertically
- Has few bends
- Terminates above nearby roof turbulence
- Is not shaded and chilled along its entire length
- Has an outlet that remains clear of debris, snow and nests
Natural draft may reverse during cold or windy conditions. Bathrooms with exhaust fans can also depressurize the room and pull odor from a poorly sealed toilet.
Fan-Assisted Ventilation
A small continuous-duty fan can provide more reliable airflow. For an off-grid installation, include its 24-hour energy consumption in the electrical budget.
The fan should be accessible for cleaning and replacement. Install it according to its electrical and environmental rating; a standard indoor fan may not be suitable for wet, corrosive air.
Common Ventilation Mistakes
- Ending the vent inside an attic
- Using many horizontal sections and sharp bends
- Placing the outlet near an opening window
- Allowing condensate to collect in a sagging pipe
- Using a screen so fine that dust blocks it
- Switching the fan off for long periods
- Failing to seal the collection chamber
If odor appears, do not immediately add perfume or chemicals. Check airflow, moisture, container capacity and urine-line cleanliness first.
Daily Use and Maintenance
A clear operating routine prevents most problems.
After Each Solid Use
Add enough dry cover material to cover exposed solids. The quantity will vary with material absorbency and whether urine is separated. The goal is coverage and moisture control, not filling the container unnecessarily.
Use only toilet paper accepted by the selected system. Do not add wipes, menstrual products, diapers, plastic, cigarette butts or household chemicals.
Weekly Checks
- Confirm that the vent fan is operating
- Inspect the urine tube for deposits or slow drainage
- Check the secondary containment tray
- Look for flies or larvae
- Confirm that cover material remains dry
- Clean the seat and external surfaces
Use cleaning products compatible with the system. Strong chemicals can damage components and may interfere with biological activity.
When to Empty the Container
Empty it before it is heavy, overfilled or difficult to remove. Do not compress the contents by hand. Wear dedicated gloves and avoid splashing or dust generation.
Follow the approved local method for transfer, treatment or disposal. Never dump fresh toilet waste into an ordinary garden compost pile, storm drain, waterway or unapproved hole.
After servicing, wash reusable components with the recommended method and wash hands thoroughly with soap and water.
Is the Finished Material Safe to Use in a Garden?
Appearance and smell cannot confirm pathogen safety. Time, temperature, moisture distribution and process consistency all affect treatment, and a small homemade container usually does not document those conditions.
Do not apply untreated or uncertain material to edible crops. Follow local health and environmental rules for secondary composting, burial or disposal. If the system manufacturer or authority requires laboratory testing, minimum retention time or a specific disposal route, follow those requirements.
Independently certified systems offer more evidence of performance than untested homemade units, but they still must be operated and serviced according to their instructions.
Troubleshooting Common Problems
| Problem | Likely causes | What to check first |
|---|---|---|
| Strong sewage odor | Excess liquid, blocked vent, fan failure or overfilled container | Restore airflow, inspect urine separation and service capacity |
| Ammonia-like odor | Urine buildup or deposits in tubing | Clean and inspect the liquid route; confirm drainage slope |
| Flies or larvae | Unscreeened opening, exposed material or poor container sealing | Seal access points, screen the vent and cover exposed solids |
| Contents too wet | Urine entering solids, wet cover material or insufficient ventilation | Correct diversion, add appropriate dry bulking material and verify airflow |
| Contents extremely dry | Too much dry material or strong heat-assisted ventilation | Follow the system instructions; do not add liquid blindly |
| Container fills quickly | Excess cover material, no urine separation or insufficient capacity | Review use rate and choose a larger or additional approved system |
| Condensation in vent | Cold vent surfaces or low spots in pipe | Insulate or reroute as appropriate and eliminate sagging sections |
| Urine line drains slowly | Mineral deposits, inadequate slope or a pinched hose | Service the line using a compatible method and correct the route |
Persistent odor, leakage, overflow or insect infestation indicates that the system is not operating correctly. Stop using it if continued operation could expose people, contaminate the building or release waste into the environment.
Composting Toilet and Greywater
A waterless toilet addresses toilet waste only. Showers, sinks, laundry and kitchens still produce wastewater.
Greywater can contain detergents, food residue, oils and microorganisms. It may require an approved collection, treatment and dispersal system even when no flush toilet is installed. A composting toilet should therefore be planned as one component of the property’s complete sanitation design—not as a universal replacement for wastewater infrastructure.
If you are exploring planted filtration, read our DIY greywater reed bed filter guide, then confirm whether such a system is permitted and appropriate for your soil, climate and wastewater load.
DIY vs. Certified Composting Toilet
| Consideration | DIY collection system | Certified manufactured system |
|---|---|---|
| Initial cost | Usually lower | Usually higher |
| Capacity evidence | Based on owner experience | Tested or stated by manufacturer |
| Local approval | May be difficult | Often easier if accepted locally |
| Maintenance | Entirely owner-designed | Documented instructions and parts |
| Treatment performance | Usually unverified | May be independently evaluated |
| Best use | Limited or temporary use with an approved disposal plan | Regular use where model and capacity are accepted |
A DIY design is not automatically the more sustainable choice. Repeated spills, inappropriate disposal or a system that users cannot maintain creates a larger problem than the water it saves.
Common DIY Composting Toilet Mistakes
- Building before checking the law. Approval may depend on the exact model, property use and greywater plan.
- Treating storage as composting. Material collected for a few days or weeks is not finished compost.
- Ignoring urine management. Excess liquid is a common cause of odor and anaerobic conditions.
- Using an unvented sealed box. Containment without controlled ventilation can push odor into the room.
- Making the container too large to lift safely. Service access and weight matter as much as capacity.
- Using unsuitable cover material. Treated sawdust, plastic-containing litter and wet material should be avoided.
- Forgetting greywater. Removing the flush toilet does not eliminate other household wastewater.
- Allowing guests to guess how it works. Simple written instructions reduce misuse.
- Operating beyond capacity. Occasional overload and continuous full-time use are different design conditions.
- Assuming odor means more cover material is always needed. Fan failure, a blocked vent or liquid leakage may be the real cause.
Planning Checklist
Before using a DIY composting toilet system, confirm that you have:
- Written information about local approval requirements
- A stable, washable enclosure
- A secure solids container
- A legal plan for removed material
- A legal plan for urine, if separated
- A separate approved greywater strategy
- Continuous and testable ventilation
- Protection against leakage and insects
- Dry cover material stored nearby
- Dedicated gloves and cleaning supplies
- Clear user instructions
- Backup sanitation for maintenance or system failure
Frequently Asked Questions
Does a composting toilet smell?
A correctly sized and maintained system with controlled airflow should not continuously release offensive odor into the room. Odor usually indicates excess moisture, inadequate ventilation, an overfilled chamber, urine deposits or a leak.
Do I need a fan?
Some installations can operate with natural draft, but a continuous-duty fan provides more predictable airflow in many buildings. Follow the approved design or manufacturer instructions and account for the fan’s energy use in an off-grid system.
Can I use regular sawdust?
Clean, untreated wood shavings or suitable sawdust may be used in some designs. Very fine material can compact and reduce airflow. Never use treated, painted or contaminated wood waste.
Can toilet paper go into a composting toilet?
Many systems accept ordinary toilet paper, but capacity and decomposition can vary. Follow the instructions for the selected system and never add wipes or other non-degradable products.
Can I put kitchen scraps in the toilet?
Do not add food waste unless the specific approved system is designed for it. Food scraps can increase moisture, attract insects and overload a small collection chamber.
How often should a composting toilet be emptied?
There is no universal schedule. Frequency depends on chamber volume, number of users, urine separation, cover material and whether the system is processing or only collecting waste. Service it before it becomes overfilled or unsafe to handle.
Is a composting toilet legal everywhere?
No. Rules vary by country, state, province, county and municipality. Some authorities accept only listed systems; others also require an approved method for greywater or reserve wastewater capacity.
Can I use the material around fruit trees?
Do not assume that material from a homemade toilet is safe for any garden use. Follow the treatment and disposal method required by the local authority. When safety is uncertain, keep it away from food-production areas and water sources.
Final Thoughts
A DIY composting toilet system can be useful when it is treated as a sanitation project rather than a piece of rustic furniture. The design must safely contain waste, control liquid, maintain airflow and provide a lawful route for everything removed from the system.
For occasional use, a simple vented collection toilet with a clear disposal plan may be sufficient where permitted. For a full-time off-grid home, a correctly sized certified unit or professionally designed central system may provide safer, more predictable performance.
Start with local requirements, design the complete wastewater plan and make maintenance access part of the system from the beginning. A toilet that is easy to inspect and service is far more likely to remain odor-free, reliable and safe.